Mac crop pictures
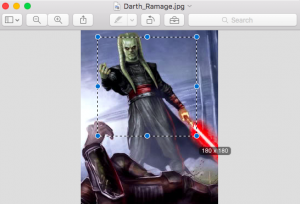
Mac crop pictures a how to tutorial. You don’t need any extra software to crop pictures on a Mac. You got everything you need built in with the OS X installation. The only software you need is the Preview program that comes with OS X.
So go ahead and open up a picture, either with double tap it, or right click and open with Preview. The we need to make a selection of the area we want to keep. Left click and drag the mouse to make a selection of what you want to keep. Everything outside the selection will be deleted.

Once you are happy with your selection, press CMD + K (Or select Tools -> Crop) to crop your picture. Or remove everything outside the selection. If you close your Preview program now, you will still have your original picture. You will need to save it manually to keep the changes. You can do that either by pressing CMD + S, or select File -> Save.
Please note that your original file will not be saved. If you want to keep your original file along with the cropped version of it. I suggest you make a copy of the picture before you crop it.
That is how Mac crop pictures.
You can read more about the Preview program, and its capabilities here https://support.apple.com/en-us/HT201740
Happy cropping!


