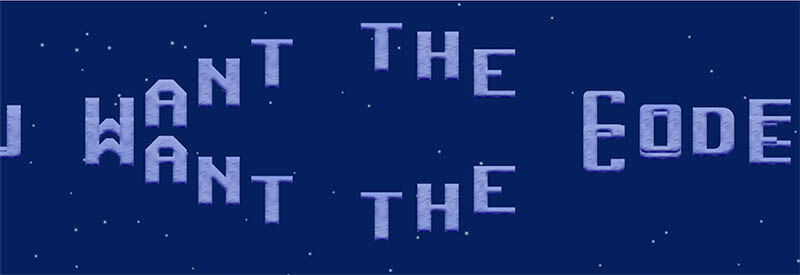
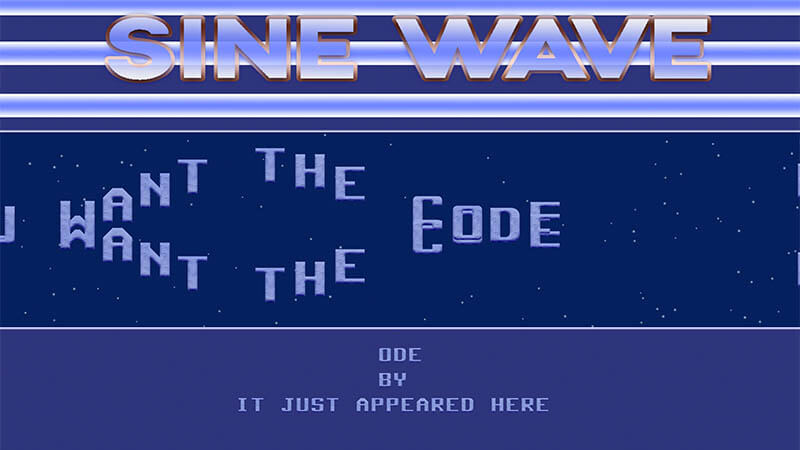
Unity Retro Demo, takes you straight back to the golden years of 80s of the 8/16 bit computer era. Since I started learning my self Unity a few months ago. I have tried Unity a few times before, but never liked it until now. Yes, I’m probably weird. So as a fun little programming challenge for my self, I decided to create something from the Amiga age.
I’m by no means an expert in C# or Unity. I have used C# for some time now. Previously only writing sensor and instruments simulators and stuff like that. I have no idea about Unity best practices. So for
The entire project can be found on this GitHub repository.
All assets used in the project are in the GitHub repository. If you only want the assets you can download it here.
Unity Retro Demo Video
A short one minute video showing the Unity retro demo. I really enjoyed it as a programming exercise for my self. Learning more about the Unity framework and the Unity editor.
Scripts used in Unity Retro Demo
SceneManager.cs – Is used to control the whole scene.
SineWave.cs – Move the upper text in a sine wave.
SineWaveUpDown.cs – Move the lower text in a sine wave.
TypeWriter.cs – It is more like a Time-To-Live script. Deletes the typewriter characters after xx seconds.
UpDown.cs – Moving the bars around the Sine Wave picture at the top.
UpDown script
All intros need a logo or picture. This one is no exception. At the top there is three bars moving up and down. It really moves in a sine wave motion, at a fixed position. So it looks a bit like the three bars is moving in an elliptic motion around the Sine Wave Picture. By the way, the Sine Wave picture is a png file with transparent background. And the sorting order is set to 4.

UpDown.cs
public class UpDown : MonoBehaviour
{
    [SerializeField]
    float frequency = 2.0f;
    [SerializeField]
    float magnitude = 1.0f;
    [SerializeField]
    float yPos = 1.0f;
    [SerializeField]
    float elapsedTime = 0f;

    private Vector3 pos;
    private Renderer rend;
    private Vector3 lastPos;

    private void Start()
    {
        pos.y = yPos;
        rend = GetComponent<Renderer>();    // Needed to change sorting order
    }

    void Update()
    {
        pos.y = yPos;
        elapsedTime += Time.deltaTime;
        lastPos = transform.position;
        transform.position = pos + (transform.up * Mathf.Sin(elapsedTime * frequency) * magnitude);

        // Check if the bars are moving up or down
        if (transform.position.y > lastPos.y)
        {
            rend.sortingOrder = 5;  // Move on the front of the picture
        }                           // The Sine Wave picture has sorting order 4
        else
        {
            rend.sortingOrder = 3;  // Mone on the back of the picture
        }
    }
}
In the start
The Update function does the movement and calculation of the movement. It starts with getting the y position. Then we add deltatime to our bars animation to get a smooth movement. lastPos is needed to determine if the bars are moving up or down. Transform.position is how we move the bars. Check out that link for the documentation. What we do here is to move them in a sine wave, but with a fixed position so it only moves up and down.
At the bottom of the Update function, we determine if the bars are moving up or down. We do that by checking the current position with the position in the previous frame. So if the bars are moving up, we set the sorting layer to 5 so we move the bars in front of the Sine Wave picture. And behind the picture when they are moving down.
SineWave.cs
This is the script that moves each character in a sine wave from right to left. The characters are created as a prefab and we use a sprite sheet to change letters.

Let’s look at the code for the sine wave text. I have made one script for the upper text scroll, and another script for the bottom text scroll. Even tho they are almost identical, except for one tiny little thing. Here is the variables I use for the SineWave script.
[SerializeField]
float moveSpeed = 3.0f;
[SerializeField]
float frequency = 2.0f;
[SerializeField]
float magnitude = 0.6f;

private Vector3 pos;
private Vector2 left;
private Renderer rend;
private Vector2 spriteHalfSize;

float elapsedTime = 0;
Just some serialized variables for speed, frequency
void Start()
    {
        pos = transform.position;
        left = Camera.main.ViewportToWorldPoint(Vector3.zero);  // Find left screen border
        rend = GetComponent<Renderer>();        // Used to find character sprite size
        spriteHalfSize = rend.bounds.extents;   // Spritesize / 2
    }
The Start function is again pretty straight forward. We get the position of the sprite, the left screen border, the renderer component and half the size of the sprite (character).
void Update()
    {
        if (pos.x < (left.x - spriteHalfSize.x))
        {
            Destroy(gameObject);
        }
        pos -= transform.right * Time.deltaTime * moveSpeed;
        elapsedTime += Time.deltaTime;
        transform.position = pos + (transform.up * Mathf.Sin(elapsedTime * frequency) * magnitude);
    }
The first thing we do in the Update method is to check if the sprite has left the screen. If it has then we destroy it. Then we calculate the next position by multiplying transform
SineWaveUpSide script
This script is almost identical to the SineWave script. This one is for the characters on the bottom scroll text.
transform.position = pos + (transform.up * Mathf.Sin(elapsedTime * frequency) * -1 * magnitude);The line above is the only difference from the SineWave script. Almost at the end, we multiply the sin function with -1 to inverse the sinus wave. So instead of using two almost identical scripts, maybe you can combine them? Use bool variable to decide if it should be inverted or not.
TypeWriter script
This is the script that removes the characters at the bottom part of the screen. Those characters are written with some kind of typewriter effect.

public class Typewriter : MonoBehaviour
{
    float timeToLive = 5.0f;

    private void Update()
    {
        timeToLive -= Time.deltaTime;
        if (timeToLive <= 0)
            Destroy(gameObject);
    }
}
This is the entire script. It is just a kind of time-to-live script. Destroy the character after a specified amount of time. In this case 5 seconds.
SceneManager script
The Scene manager script is the main script in the unity retro demo. It puts it all togheter.

First is the declaration of variables. Nothing special going on there, so we gonna skip that part. Check out Unity’s tutorial about data types if you are not confident with data types. Just remember if you are going to use these scripts, these two variables need to use lower caps letters only. And you can only use letters from a to z. Anything else will be treated as
private static string message = "    hello world      check out the description below for the github link if you want the code      enjoy   ";

string[,] data = new string[,]
{
   {"music", "by", "joshuaempyree"},
   {"graphics", "by", "a magic unicorn"},
   {"code", "by", "it just appeared here"}
};
Start and Update functions only
private void Start()
{
    StartCoroutine(TypeWriter());
}

void Update()
{
    SineText();
}
For both the SineWave and TypeWriter effect, we need to convert each character to a number so we can pick out
int SelectChar(char selChar)    // convert from char to "ascii code" as integer
{
    return selChar - 97;    // a has ascii code 97 and our spritesheet starts at 0
}
The ASCII code for the letter is 97. By converting from char to integer we get the ASCII code. Our sprite sheets start at 0 and not 97. Just subtract 97 from the ASCII code and we get a number which matches our sprite sheets.
The typewriter
Look at the TypeWriter function. Unlike the other functions, this one is declared as an IEnumerator instead as void or a data type.
IEnumerator TypeWriter()
{
    float startingPoint;
    GameObject spriteChar;
    int stupidChar;
    float startLine = -2.6f;

    dataLines = data.GetLength(0);
    dataWords = data.GetLength(1);

    yield return new WaitForSeconds(1f);

    while (true)
    {
        for (int y = 0; y < dataLines; y++)
        {
            for (int i = 0; i < dataWords; i++)
            {
                printChars = data[y, i].ToCharArray();  // Convert string to char array
                startingPoint = ((data[y, i].Length * charSize) / 2) * -1;  // Find the starting point
                foreach (char oneChar in printChars)
                {
                    stupidChar = SelectChar(oneChar);
                    if (stupidChar >= 0 && stupidChar <= 26)
                    {
                        spriteChar = Instantiate(letter3, new Vector3(startingPoint, startLine, 0f), Quaternion.identity);
                        spriteChar.GetComponent<SpriteRenderer>().sprite = characters[stupidChar];  // Select correct char to display
                        yield return new WaitForSeconds(.2f);
                    }
                    startingPoint += charSize;
                }
                startLine -= lineSpacing;
            }
            startLine = -2.6f;  // Reset the start line after each block of text
            yield return new WaitForSeconds(5.5f);
        }
    }
}
First the usual. Variable declarations. Since we want this effect to loop unlimited we put the entire thing inside a while true loop.
We use a nested for loop to read thru all the words in the 2d string array data. The inner for loop read the actual words, and the outer for loop cycle thru each “line”. Take a look at the code inside the nested for loop.
printChars = data[y, i].ToCharArray();
startingPoint = ((data[y, i].Length * charSize) / 2) * -1;  // Find the starting point
foreach (char oneChar in printChars)
{
    stupidChar = SelectChar(oneChar);
    if (stupidChar >= 0 && stupidChar <= 26)
    {
        spriteChar = Instantiate(letter3, new Vector3(startingPoint, startLine, 0f), Quaternion.identity);
        spriteChar.GetComponent<SpriteRenderer>().sprite = characters[stupidChar];
    }
        startingPoint += charSize;
}
First, we convert the string to a char array into printChars. Then we calculate the starting for each line. We want each line to be centered on the screen. To find the starting point we take the number of characters and multiply with a specified char size. Next, we divide it by 2 to get half the size and multiply with -1. We multiply with -1 to make it start on the left side of the screen. The origo in Unity coordinate system is exactly in the middle of the screen. So the coordinates on the left side are negative.
We use a
The Sine Wave
void SineText()
{
    timer += Time.deltaTime;
    if (timer >= waitTime && charCounter < message.Length)
    {
        whatChar = SelectChar(messageChars[charCounter]);
        if (whatChar >= 0 && whatChar <= 26)    // Only accept a to z in lower capital
        {
            myChar = Instantiate(letter, new Vector3(9f, firstYpos, 0f), Quaternion.identity); // X=9, Y=-0.25
            myChar.GetComponent<SpriteRenderer>().sprite = characters[whatChar];    // Select image for the sprite
            MyUpsideChar = Instantiate(letter2, new Vector3(9f, secondYpos, 0f), Quaternion.identity);
            MyUpsideChar.GetComponent<SpriteRenderer>().sprite = characters[whatChar];
        }
        charCounter++;
        timer = 0f;
    }
    else if (charCounter >= message.Length)   // If end of string, restart
    {
        charCounter = 0;
    }
}
First, we make sure that the timer is more or equal to waitTime and there is still more characters in the message to be printed. Then we see the same char to ASCII conversion function again, SelectChar. And again only a to z accepted. If it is between a and z we spawn a letter and we select the right sprite and use the renderer to change it. Since we have two scrolling texts we do that twice. At the
MyChar and MyUpsideChar. Again this plugin does not show <> in codes. So don’t copy from this code. Copy from the GitHub code instead.
If you lost the will to live by reading this and starting to hate Unity, I also have an article on how to remove it from your mac. Or maybe you tried to install Unity and ended up with error 1.


This Post Has One Comment