Like most other people, I hate spam, and with a self-hosted mail server, I needed to learn about Roundcube spam filter. Sometimes I received more than 100 emails every day. That’s really depressing when trying to avoid deleting the emails that are not spam. Something had to be done.
My first step was to block certain IPs and IP ranges. I will cover that part in another post. That can work really well against some spammers. Especially if they are using mass email services. Then you just run a whois against one of their IP’s and you usually find their IP range quite easily. When the range is found, just block the entire range. More about that in another post.
In some cases, I also blocked entire top-level domains, as some of the top level domains seems to be very popular among spammers. I will cover that too in a later post. That is very easy to do once you know how to do filters in Roundcube. First, we will look at how to make your own Roundcube spam filter.
Roundcube Spam Filter
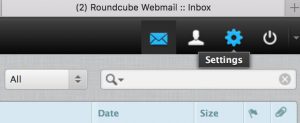
The first thing we do after logging in click the settings button, and you should see something like the picture below.
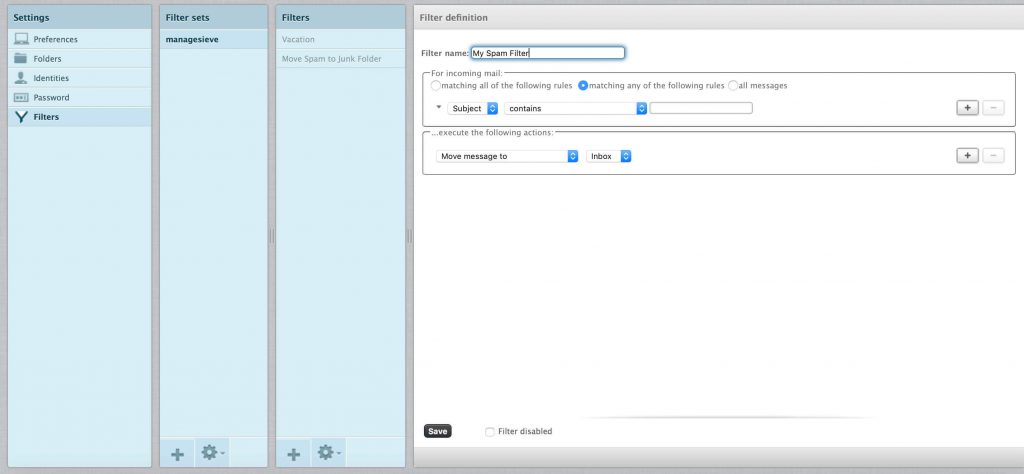
In the first row click Filters. Under filter sets you probably one have one item; managesieve. So, of course, click that one. The third and last row you have Filters. By default, you probably have one “named vacation”. That’s the one you enable if you want to send an out of office reply. The last filter is probably “Move Spam to Junk Folder”.
At the bottom of the Filter row, click the plus sign. Now a filter definition window will appear on the right side of the screen. Give your new spam filter a name. You can not save it until you have created the first filter rule.
Block a specific mail address
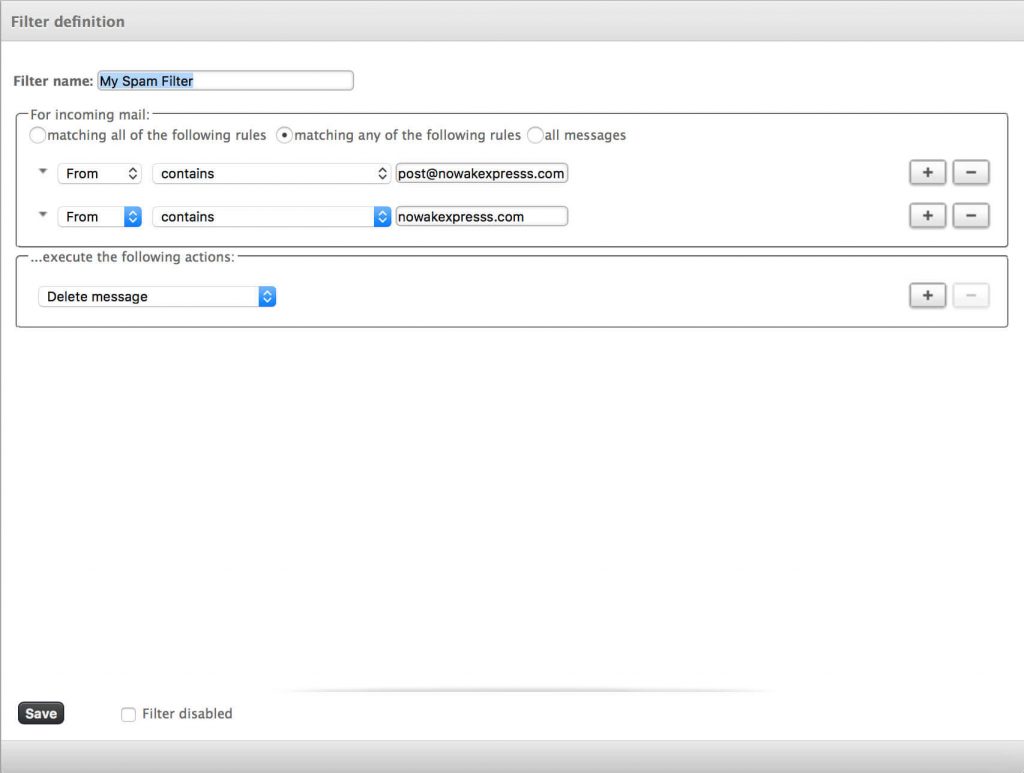
On the part of the filter name, your mail is ready for your filter rules. Change “subject” to “from”. The next drop down menu can just stay on “contains”. Or it can be “equal” for this example. It doesn’t matter since we will block a specific mail address. The last text field you will enter the mail address you want to block. Like in the picture below.
Block the entire domain
Since we found out the spammers uses several different mail addresses from the same domain, we will block the entire domain. At the end of the line where you blocked the mail address, click the plus sign to add another filter rule. Select “From”, then “contains”. Here it is important that you select “contains” since we want to block all emails that are being sent from this domain. In the text field at the end, we type in the domain name. Just like in the picture below. Below the filter rules, you can select what to do with those emails you are catching with your filter. I would just delete them. Some spammers look for replies and that way they know your email address is being active. Because of that, I would avoid “Discard with message”. Even thou it is tempting to tell them to go to…
When those two filter rules have been added you can save the filter. You could also have done that after the first filter rule. Now your filter set should appear in the third row at the bottom, under the “move spam to junk folder”. Now you need to grab your filter set with the mouse and move it above “move spam to junk folder”. That “move spam to junk folder” filter rule has enabled an option to stop evaluating more rules.
That’s if for creating your own Roundcube spam filter.
If you are interested, please check out Linux live log files.
Check out Spamhaus for known mass spammers.
Enjoy less spam!




This Post Has 2 Comments