Chrome for Linux Mint 18 installed from scratch. There are two ways you can install Chrome for Linux Mint 18. One way is to do it the traditional way of downloading an installer file and run it. The other way is to use Terminal to download and install it the usual Linux way. Let us see how we do it both ways.
Install Chrome for Linux Mint 18 from a web browser
The first thing we need to do is to find the Chrome install file. Open your browser and go to (https://www.google.com/chrome/browser/desktop/index.html). Or open Google and search for Chrome. The first page you will find is the Google Chrome page. Since you are doing this from a Linux computer, Google knows you are looking for a Linux version of Chrome.
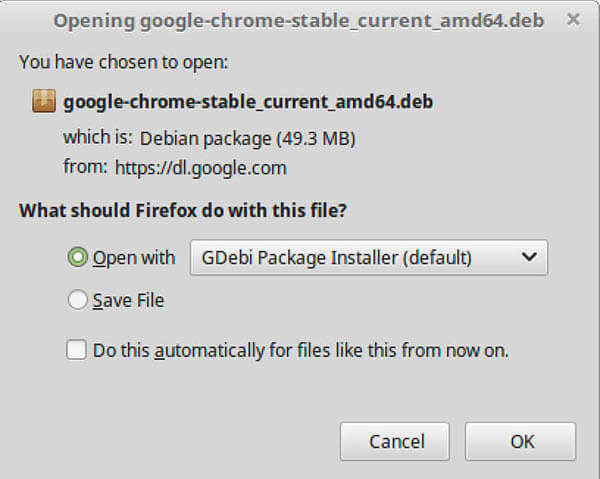
Google will now ask you what kind of package you want to download. If you want 64 bit .deb or 64 bit .rpm. You need to select the .deb package. That is for Debian and Ubuntu. Linux Mint is based on Ubuntu (which is based on Debian). Fedora (or Red Hat) and OpenSUSE have a completely different package system, so don’t choose that one. Then click ACCEPT AND INSTALL.

Linux Mint will now ask what your browser should do with the file you downloaded. It will normally suggest to open it with GDebi. That is the standard package installer in Linux Mint. Just go ahead and click OK.
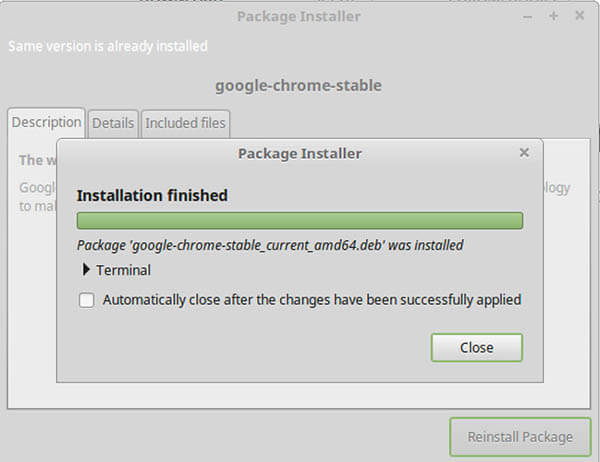
The package installer will then check if all dependencies are present. If you installed Linux Mint the normal way, that should be ok. Click Install Package and the installation will begin. Once the package is installed, click Close to close the installer window.
Now Chrome for Linux Mint 18 is installed on your system and ready to use. That is one way of doing it. Let us see how to install it from the Terminal window.
Install Chrome for Linux Mint 18 from Terminal
No point in installing a web browser if you only have terminal access. Even tho there is a text-based web browser, Google Chrome is not one of them. However, if you are like me, you probably prefer working in Terminal over the Desktop. I feel more in control when using Terminal.
The first thing you need is to log in to root.
sudo su
Then we need to add the Google Chrome repository to our sources list. We do that like this.
echo “deb [arch=amd64] http://dl.google.com/linux/chrome/deb/ stable main” > /etc/apt/sources.list.d/chrome.list
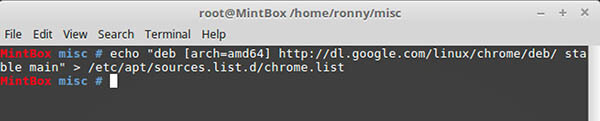
You could of course open the /etc/apt/sources.list.d/chrome.list file and paste in the line above your self too. But the echo command is more convenient.
To be able to validate the installation we need to add the public key for the repository we just added. You will do that by running this command.
wget -q -O – https://dl-ssl.google.com/linux/linux_signing_key.pub | apt-key add –

After doing changes to the repositories and source list we need to update the package manager.
apt-get update
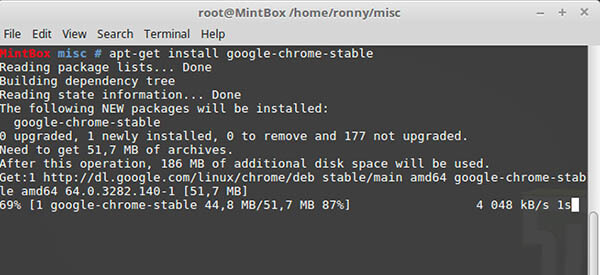
When the updating is done it is time to install Chrome for Linux Mint 18. The name of the package is google-chrome-stable. So we install that by:
apt-get install google-chrome-stable
Now the Chrome browser is installed on your system, and ready to use.
Bonus tip
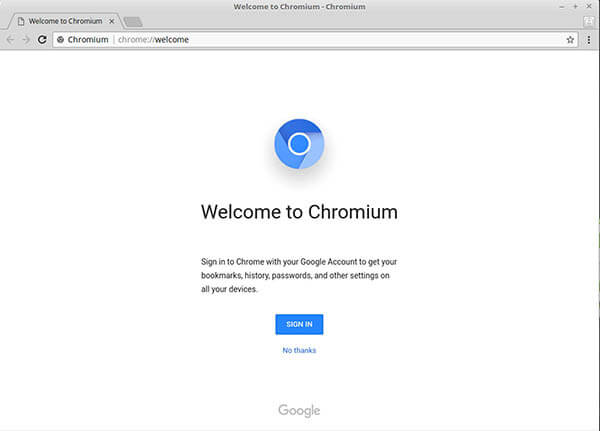
Chrome is a good web browser. I used it as my primary web browser when I was using Windows. You might want to try out a web browser called Chromium. It is like Google Chrome because this is where Chrome gets it source code from. Chromium is, just like Chrome is a project run by Google.
The package name of the Chromium browser is chromium-browser. And is part of the Mint repository, so no need to change the sources and add public keys. Just do the installation by running this command.
apt-get install chromium-browser
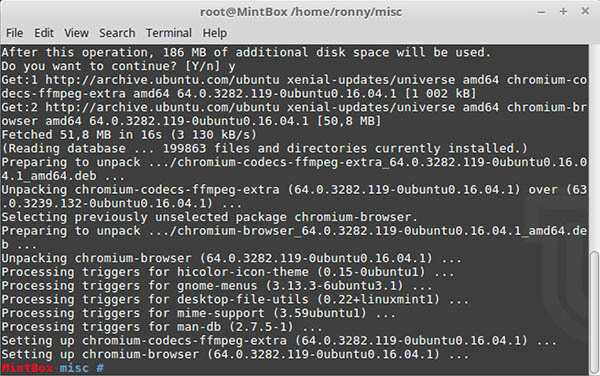
Chromium is now ready on your system. That is how you install Chrome for Linux Mint 18, or even Chromium. Enjoy!
Check this if you are wondering what the default Linux Mint root password is. Linux mint default password.